In this article, I will show a few tips and tricks on how it is possible to format the measures.
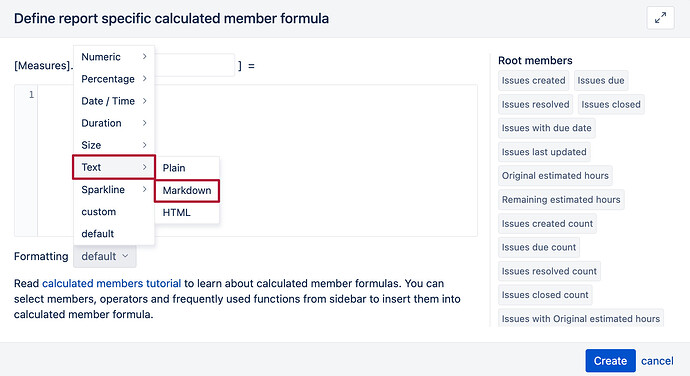
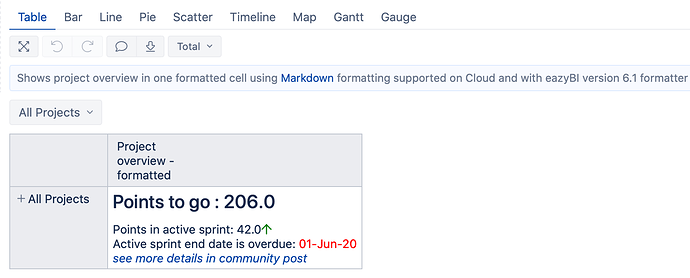
In eazyBI, there are two interesting ways on how to format measures to get a different appearance. First is our newest formatting option, Text->Markdown (available on Cloud and starting from the eazyBI version 6.1), and second is a Custom format with which you can change the formatting of the measure.
Markdown
You can use Markdown formatting to show a rich text (bold, italic) or clickable URL links. Also, you can use HTML for more advanced formatting, e.g., show an icon or image as a measure. As eazyBI uses font-awesome icons, it is possible to refer to them in calculated measures or in report/dashboard description when using markdown formatting. Check out a few examples.
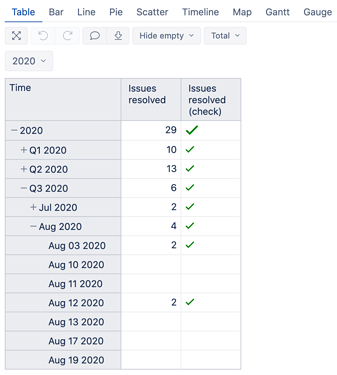
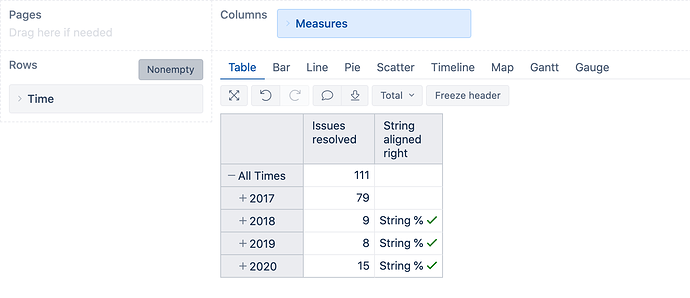
Example 1, Issues resolved (check)
This measure returns for Year level where issues are resolved a green check, which is a bit bigger (increased font size) than checks in below levels where issues also are resolved.
CASE WHEN [Time].CurrentHierarchyMember.Level.Name = "Year" AND
  [Measures].[Issues resolved] > 0 THEN
    "<i class='far fa-check' style='color:green;font-size:20px'></i>"
  WHEN [Measures].[Issues resolved] > 0 THEN
    "<i class='far fa-check' style='color:green'></i>"
END
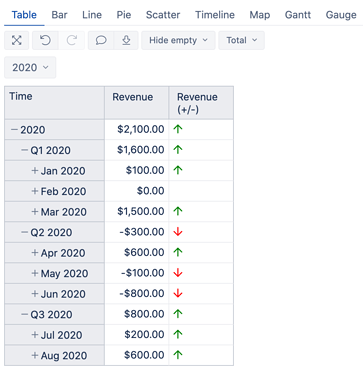
Example 2, Revenue (+/-)
This measure returns a green arrow up when revenue is above zero, or a red arrow down when revenue is below zero.
CASE WHEN [Measures].[Revenue] > 0 THEN
    "<i class='far fa-arrow-up' style='color:green'></i>"
  WHEN [Measures].[Revenue] < 0 THEN
    "<i class='far fa-arrow-down' style='color:red'></i>"
END
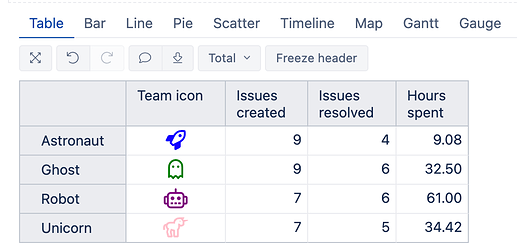
Example 3, Team icons
This measure returns a different icon for each Project Team.
CASE [Project team].CurrentMember.Name
  WHEN 'Ghost' THEN
'<i class="far fa-ghost" style="color:green;font-size:20px;display:block;text-align: center"></i>'
  WHEN "Astronaut" THEN
'<i class="far fa-rocket" style="color:blue;font-size:20px;display:block;text-align: center"></i>'
  WHEN "Unicorn" THEN
'<i class="far fa-unicorn" style="color:pink;font-size:20px;display:block;text-align: center"></i>'
  WHEN "Robot" THEN
'<i class="far fa-robot" style="color:purple;font-size:20px;display:block;text-align: center"></i>'
END
Example 4, Value in other color
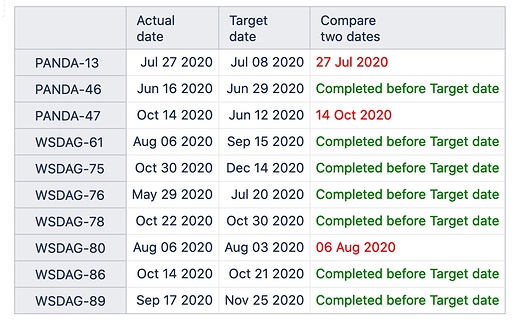
This measure compares two dates. If the first date is greater than the second date, it will show the first date in red color.
CASE WHEN --compare two dates
  DateCompare(
    [Measures].[Actual date],
    [Measures].[Target date]
  ) > 0
THEN --if Actual date > Target date, show Actual date in red
  "<span style='color:red'>" || Format([Measures].[Actual date],'dd mmm yyyy') || "</span>"
ELSE --if Actual date =< Target Date, show text in green
  "<span style='color:green'>Completed before Target date</span>"
END
Also, a more complex solution is possible, see an example from our demo account.
Where and how to get Icons?
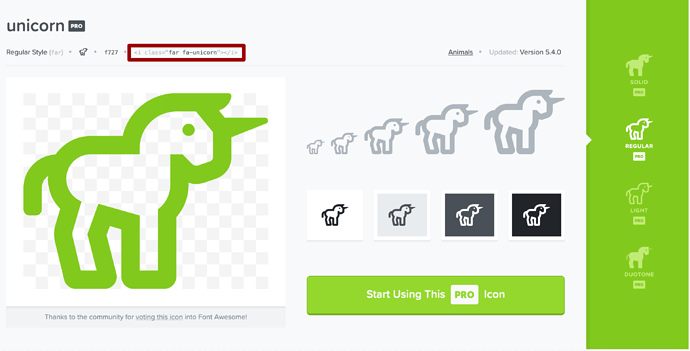
To get an icon code from font-awesome, you need to find an icon you like and copy the code from it.
Note that eazyBI uses only some of those icons, so testing is needed to see if the icon is available from eazyBI.
Also, for Jira Server, you can upload pictures to the server and reference them in your measures. See the instructions here.
Custom
With Custom formatting, you can change the result representation to another. For more details (and string templates), see how to Format string content.
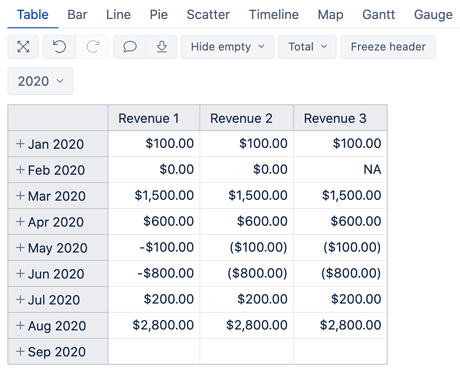
In the example below, you can see how the same measure representation changes using three different custom formatting options:
Revenue 1
$#,##0.00
Revenue 2
$#,##0.00;($#,##0.00)
Revenue 3
$#,##0.00;($#,##0.00);\N\A
Custom formatting can also be used together with the format() function to change the result and create specific formatting. In this case, custom formatting is set as #.
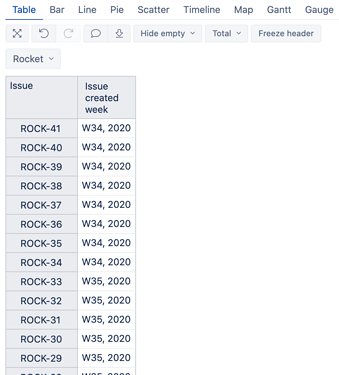
Issue created week
This measure returns the week number and year in which the issue was created.
Format(
  [Measures].[Issue created date],
  '"W"ww, yyyy'
)
